
Checklist for Delegating Renderings through 4Dbiz
Delegating renderings is an excellent way for interior designers to save time and focus on their creative vision. To ensure a smooth process and achieve the best possible results, here’s a detailed checklist to follow when delegating a rendering task to 4Dbiz. By providing the correct information upfront, you help us streamline the process and deliver accurate, high-quality renderings quickly and efficiently.
1. Select Your Desired Rendering Style
When requesting a rendering, you must clarify which style you prefer. The two most common types are:
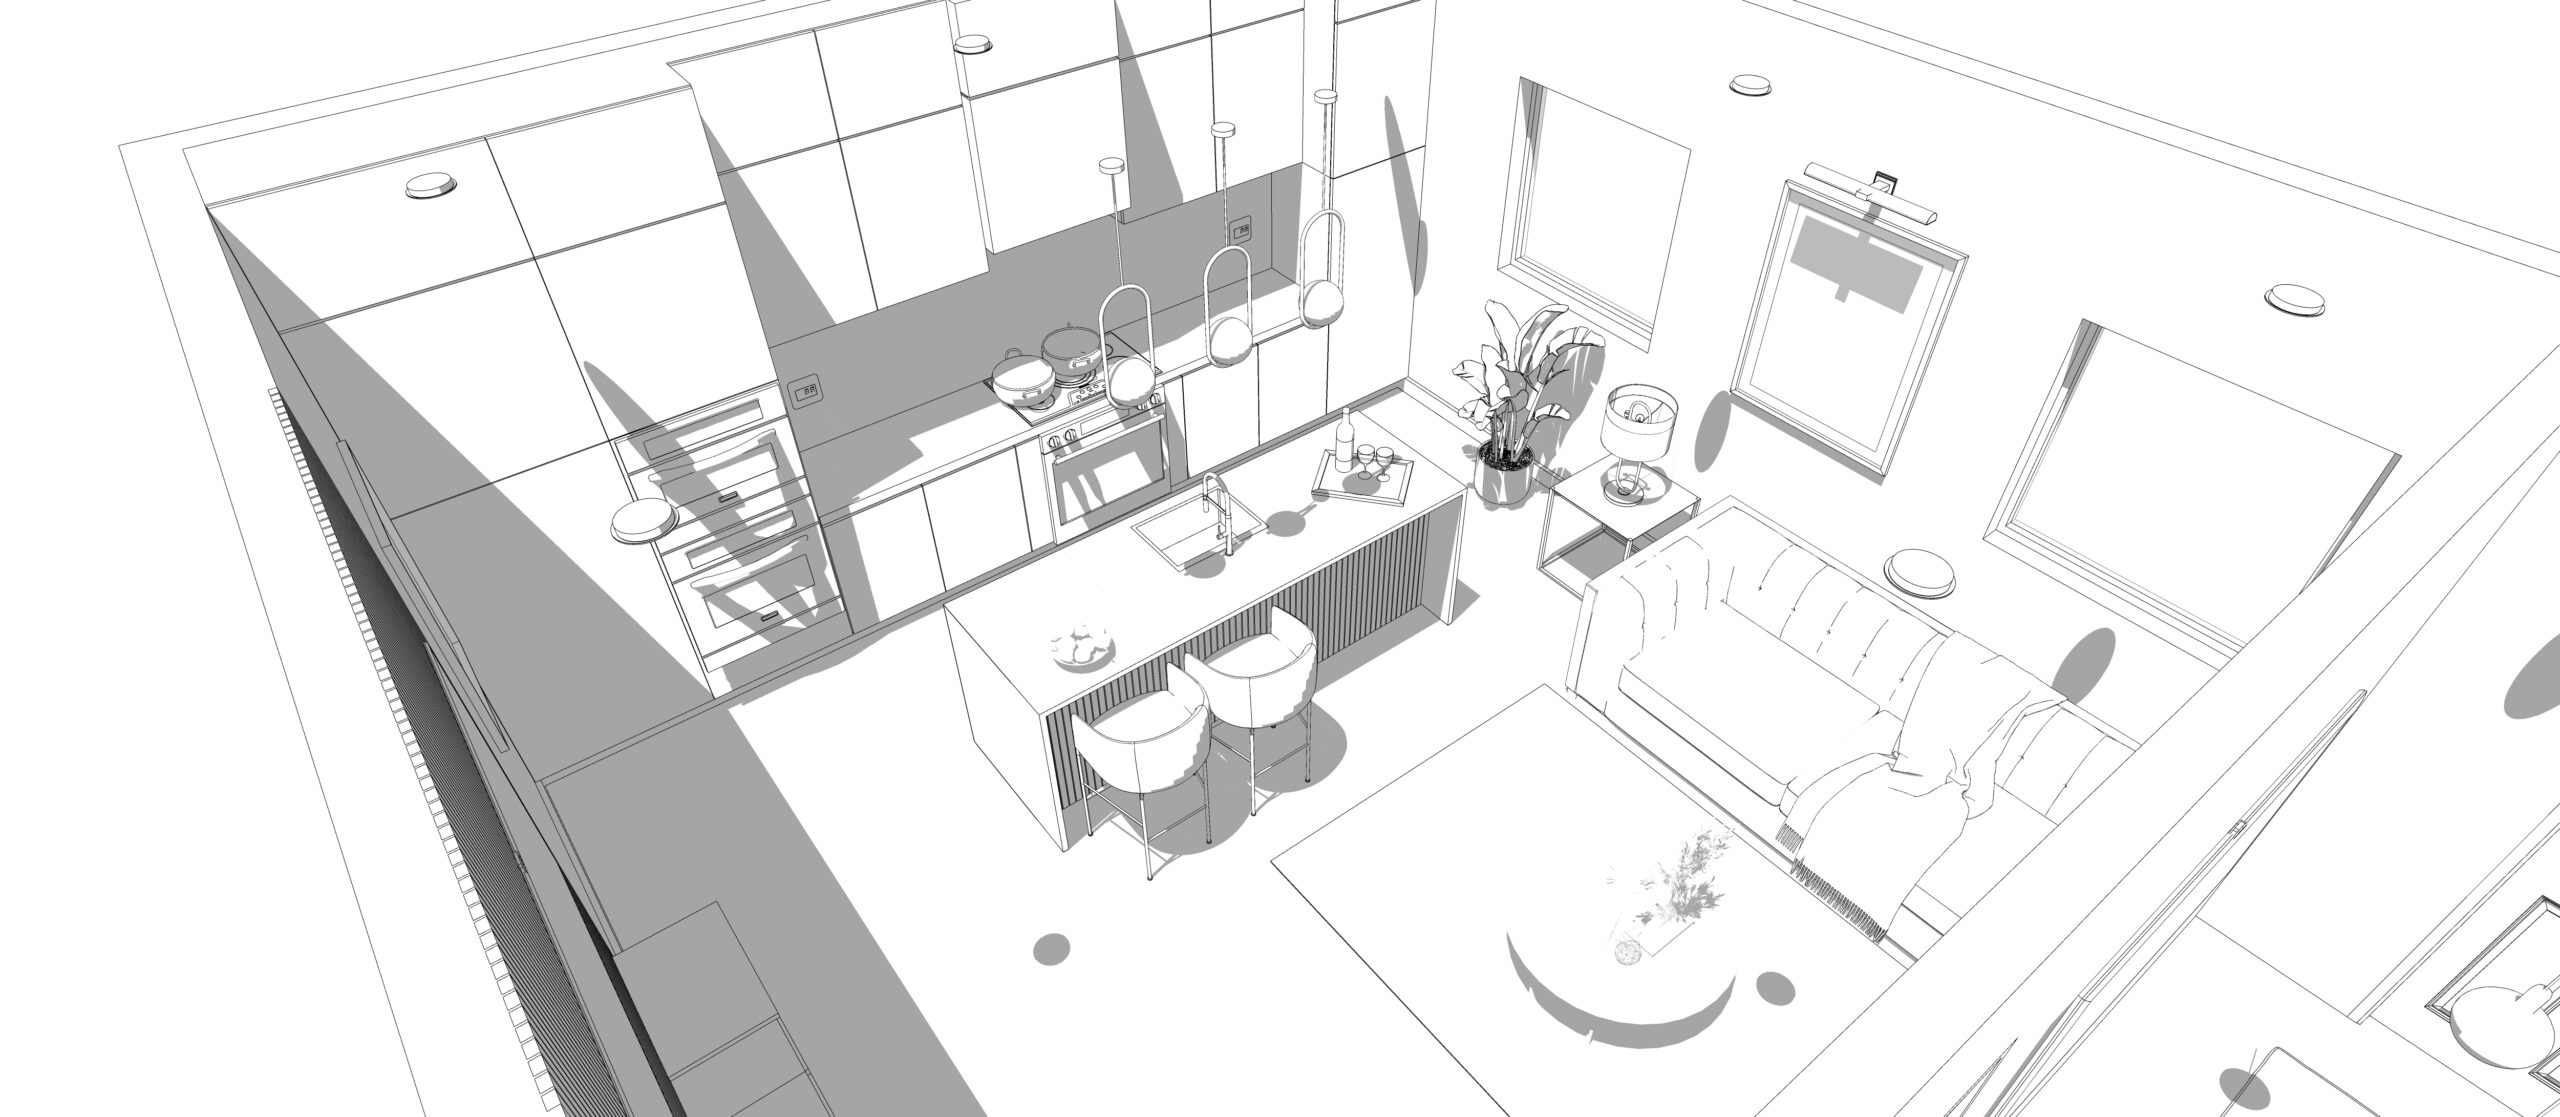
- 3D Model: These are less detailed and focus more on spatial relationships and basic design elements. This style is great for quickly visualizing the layout and structure of a space.
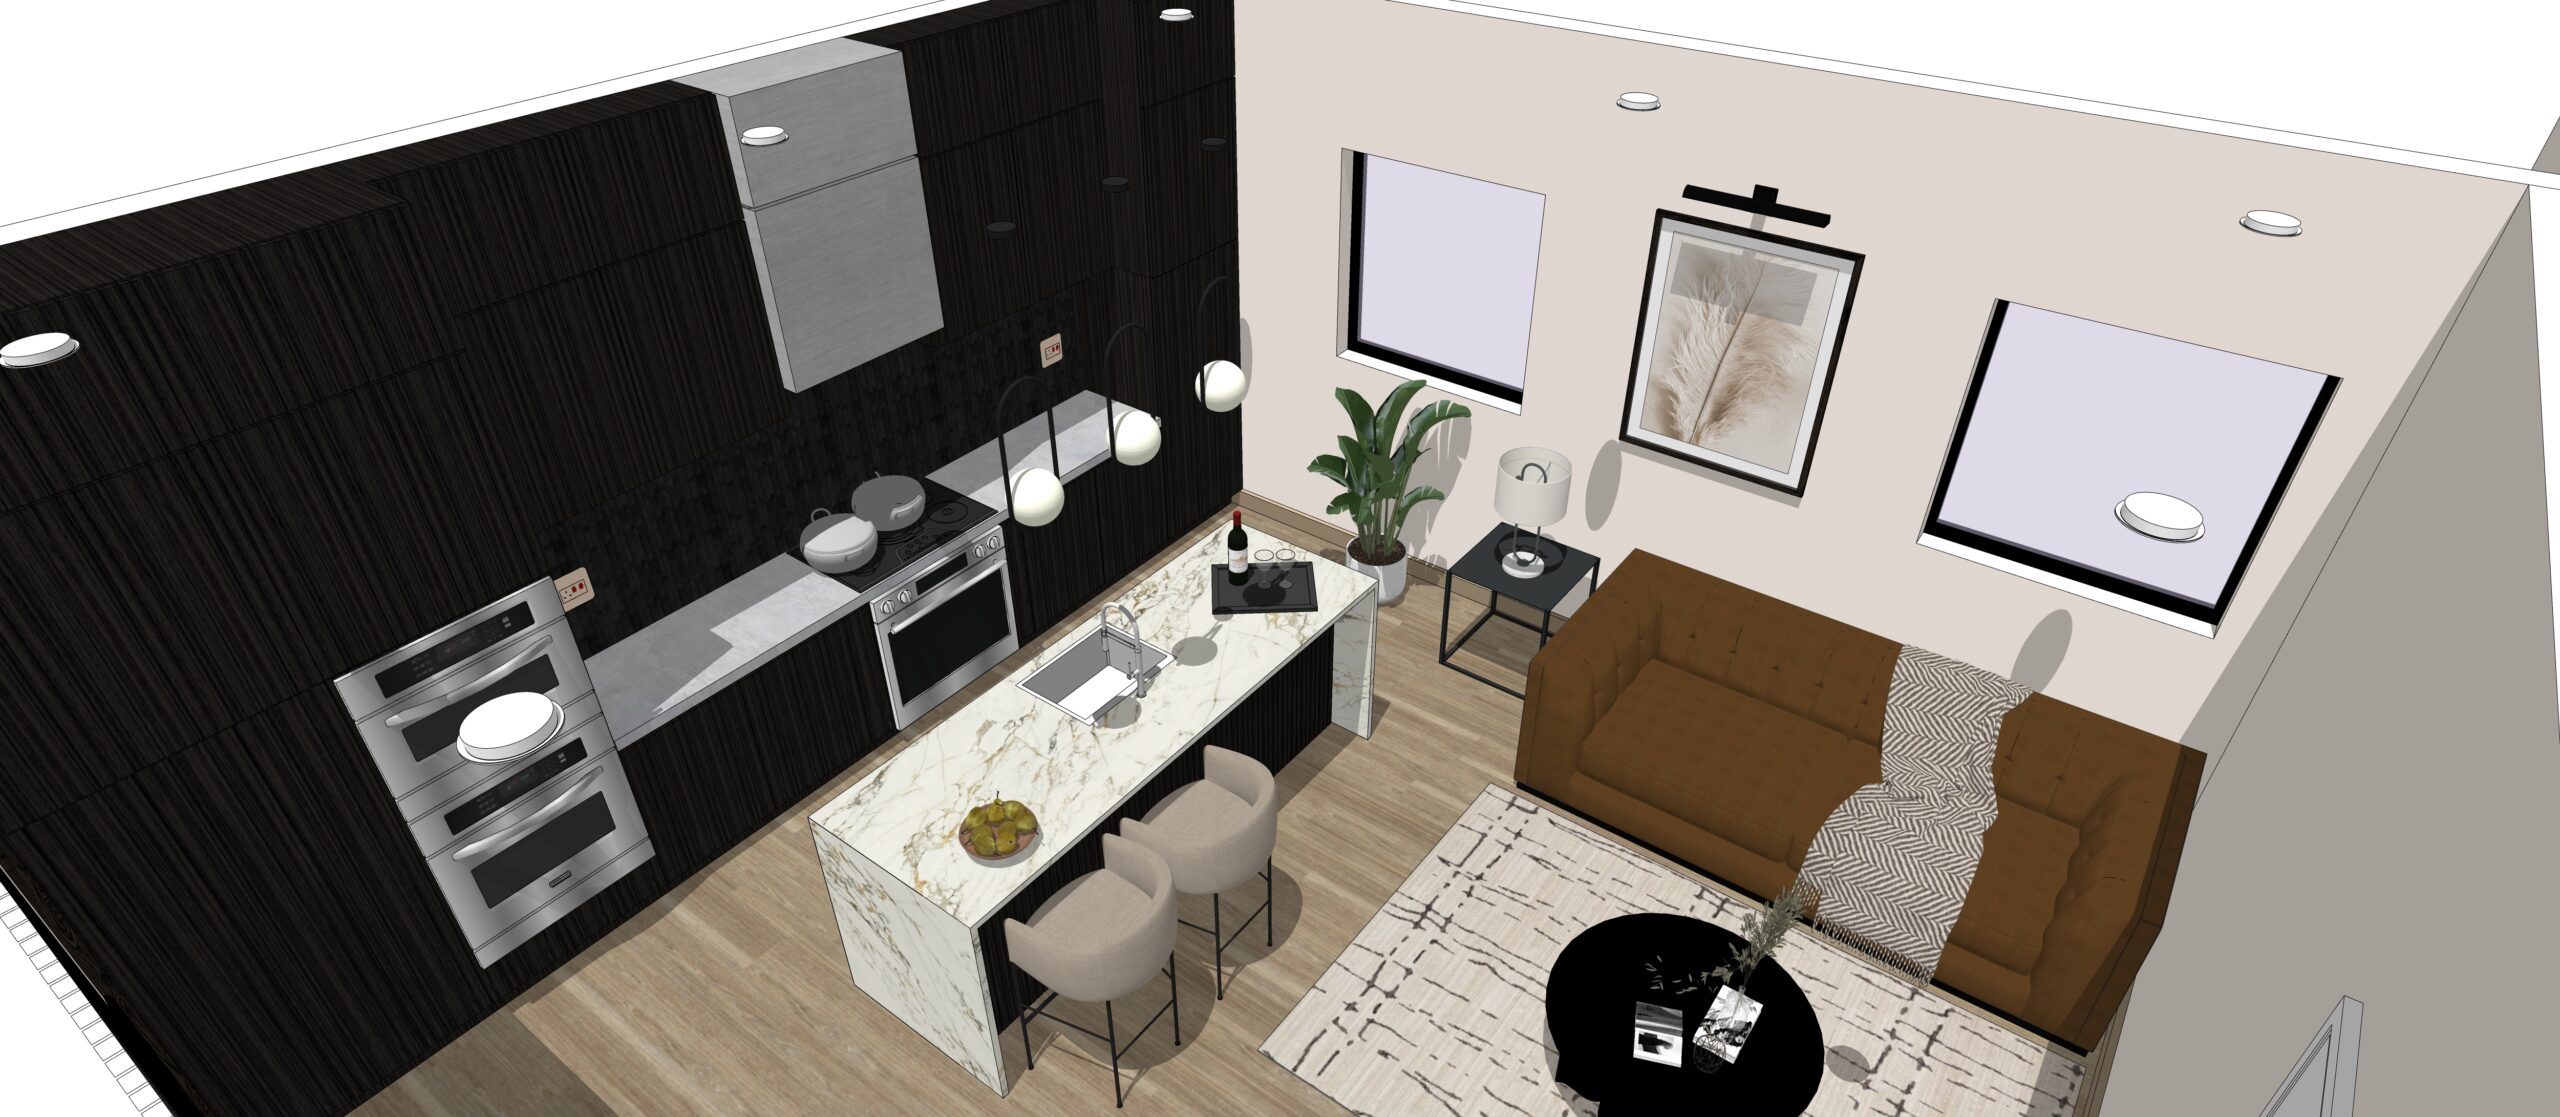
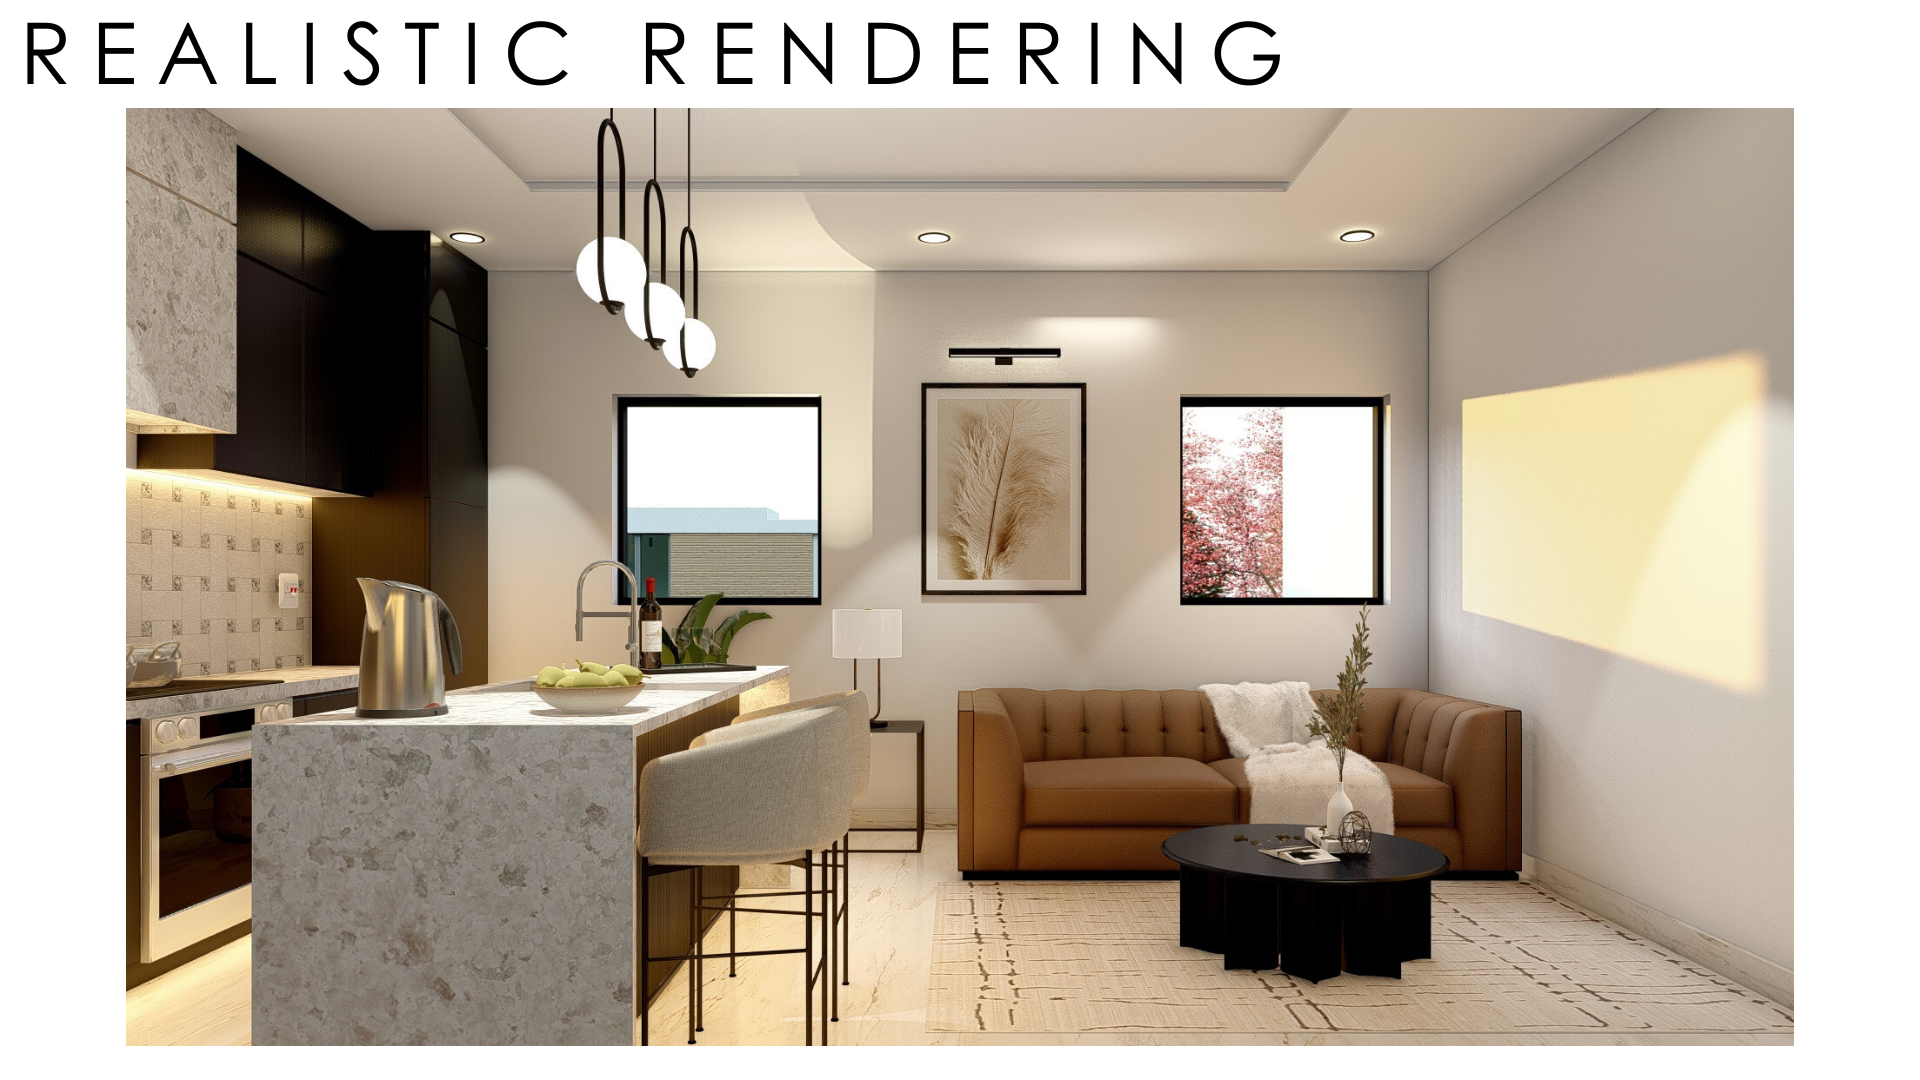
- Photorealistic Rendering: This style offers a high level of detail, creating a near-realistic visual representation of your space, including textures, lighting, and materials. It’s perfect for presentations where a polished, lifelike visualization is needed.
By selecting the appropriate style early, we can better meet your expectations and help you showcase your designs most effectively.
2. Provide a Detailed Floor Plan
The floor plan is the foundation of your rendering. If you have a CAD file, please share it with us to ensure accuracy in the dimensions and spatial arrangements. A clear, precise floor plan enables our team to accurately translate your design into a 3D model or photorealistic rendering.
If you don’t have a CAD file or need additional drafting support, don’t worry! 4Dbiz offers drafting services to help you create the floor plan and layout you need, so you don’t need to worry about missing this critical step. Reach out to us to discuss how we can assist with your drafting needs and streamline your rendering process.
3. Provide Photos of the Space
Photos of the actual space are beneficial. They allow our team to cross-reference your floor plan with the actual environment, ensuring the rendering accurately reflects the spatial dimensions, lighting, and existing room features. These photos help us:
- Visualize the space’s depth and scale
- Incorporate any existing elements into the rendering
- Align with the client’s expectations for the final output
The more detailed and clear your photos, the better we can ensure the rendering’s accuracy.
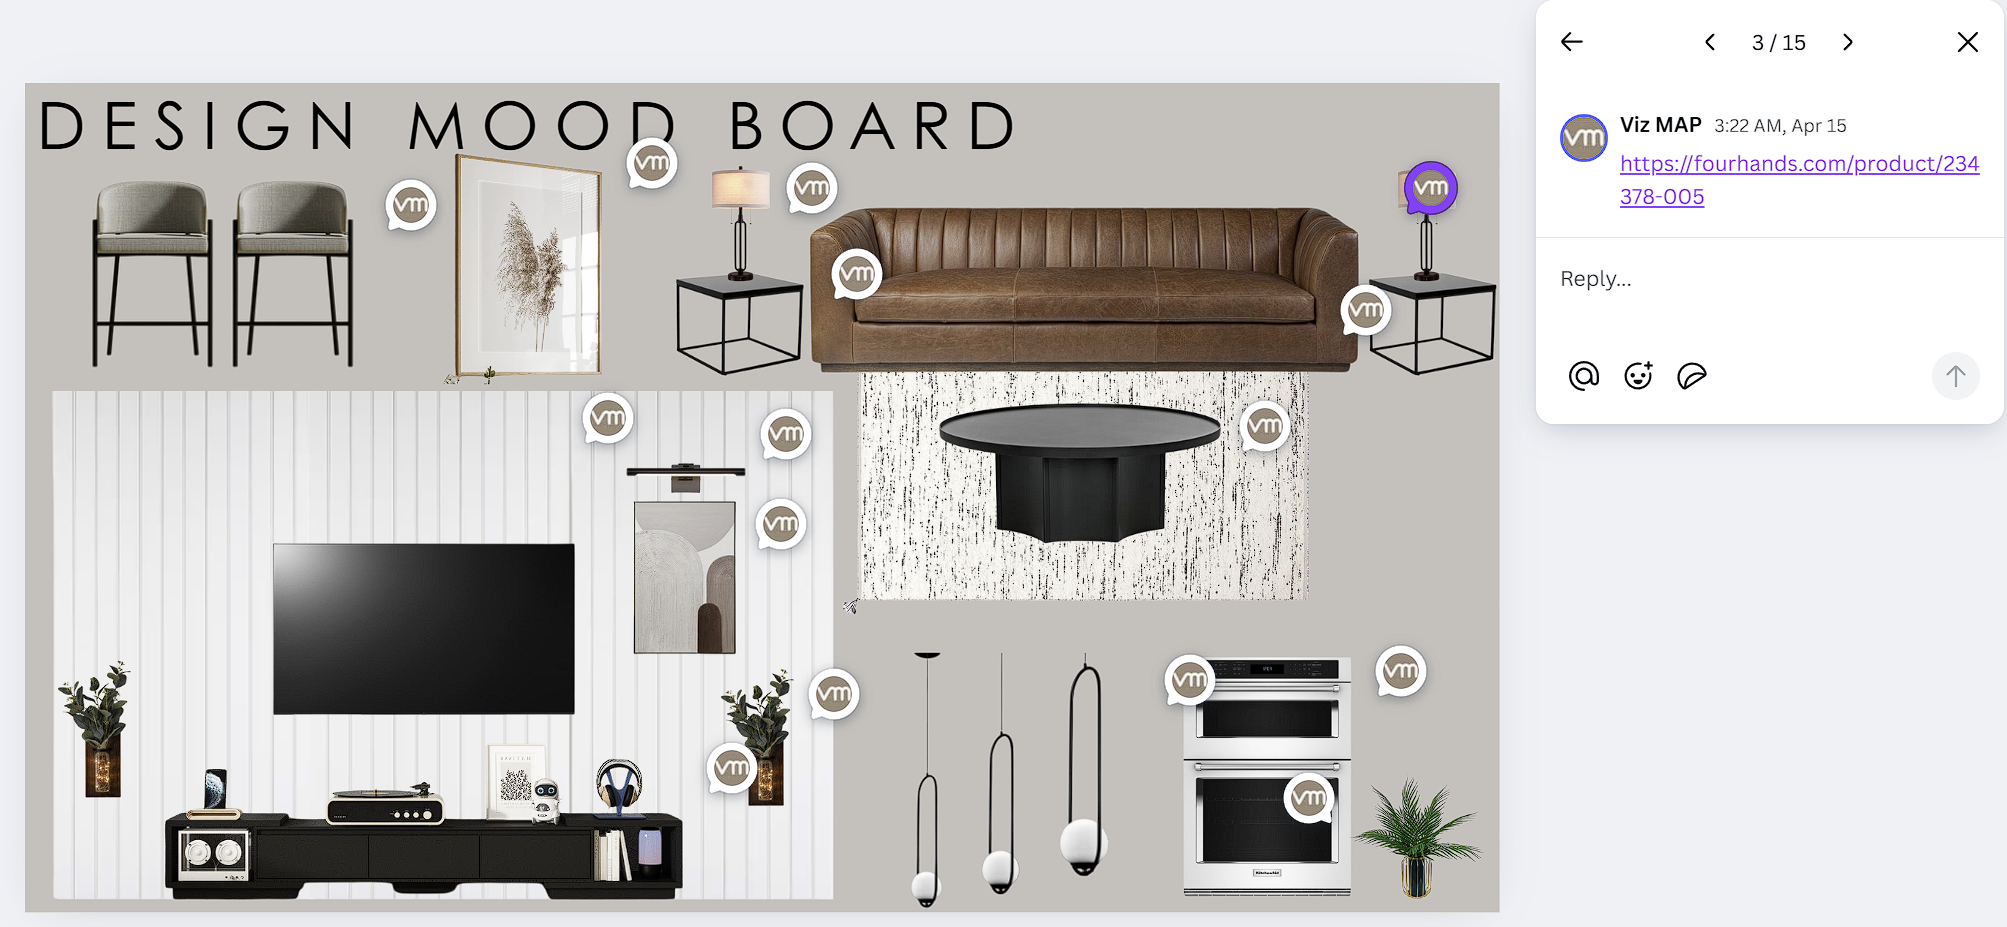
4. Provide a Concept/Mood Board & Live Links to All Selections
A mood board or concept board is crucial in conveying the design direction. It helps us understand the style, color palette, and design concept you want to achieve.
Along with the mood board, providing live links to all selections (furniture, finishes, lighting, etc.) is essential. These links allow us to directly pull specs, dimensions, and images from the vendors, ensuring that the products are accurately represented in the rendering.If you don’t have a mood board, you can still provide these selections by sharing a list of products with links to the specifications. The more specific and direct the information, the faster and more accurate the rendering.
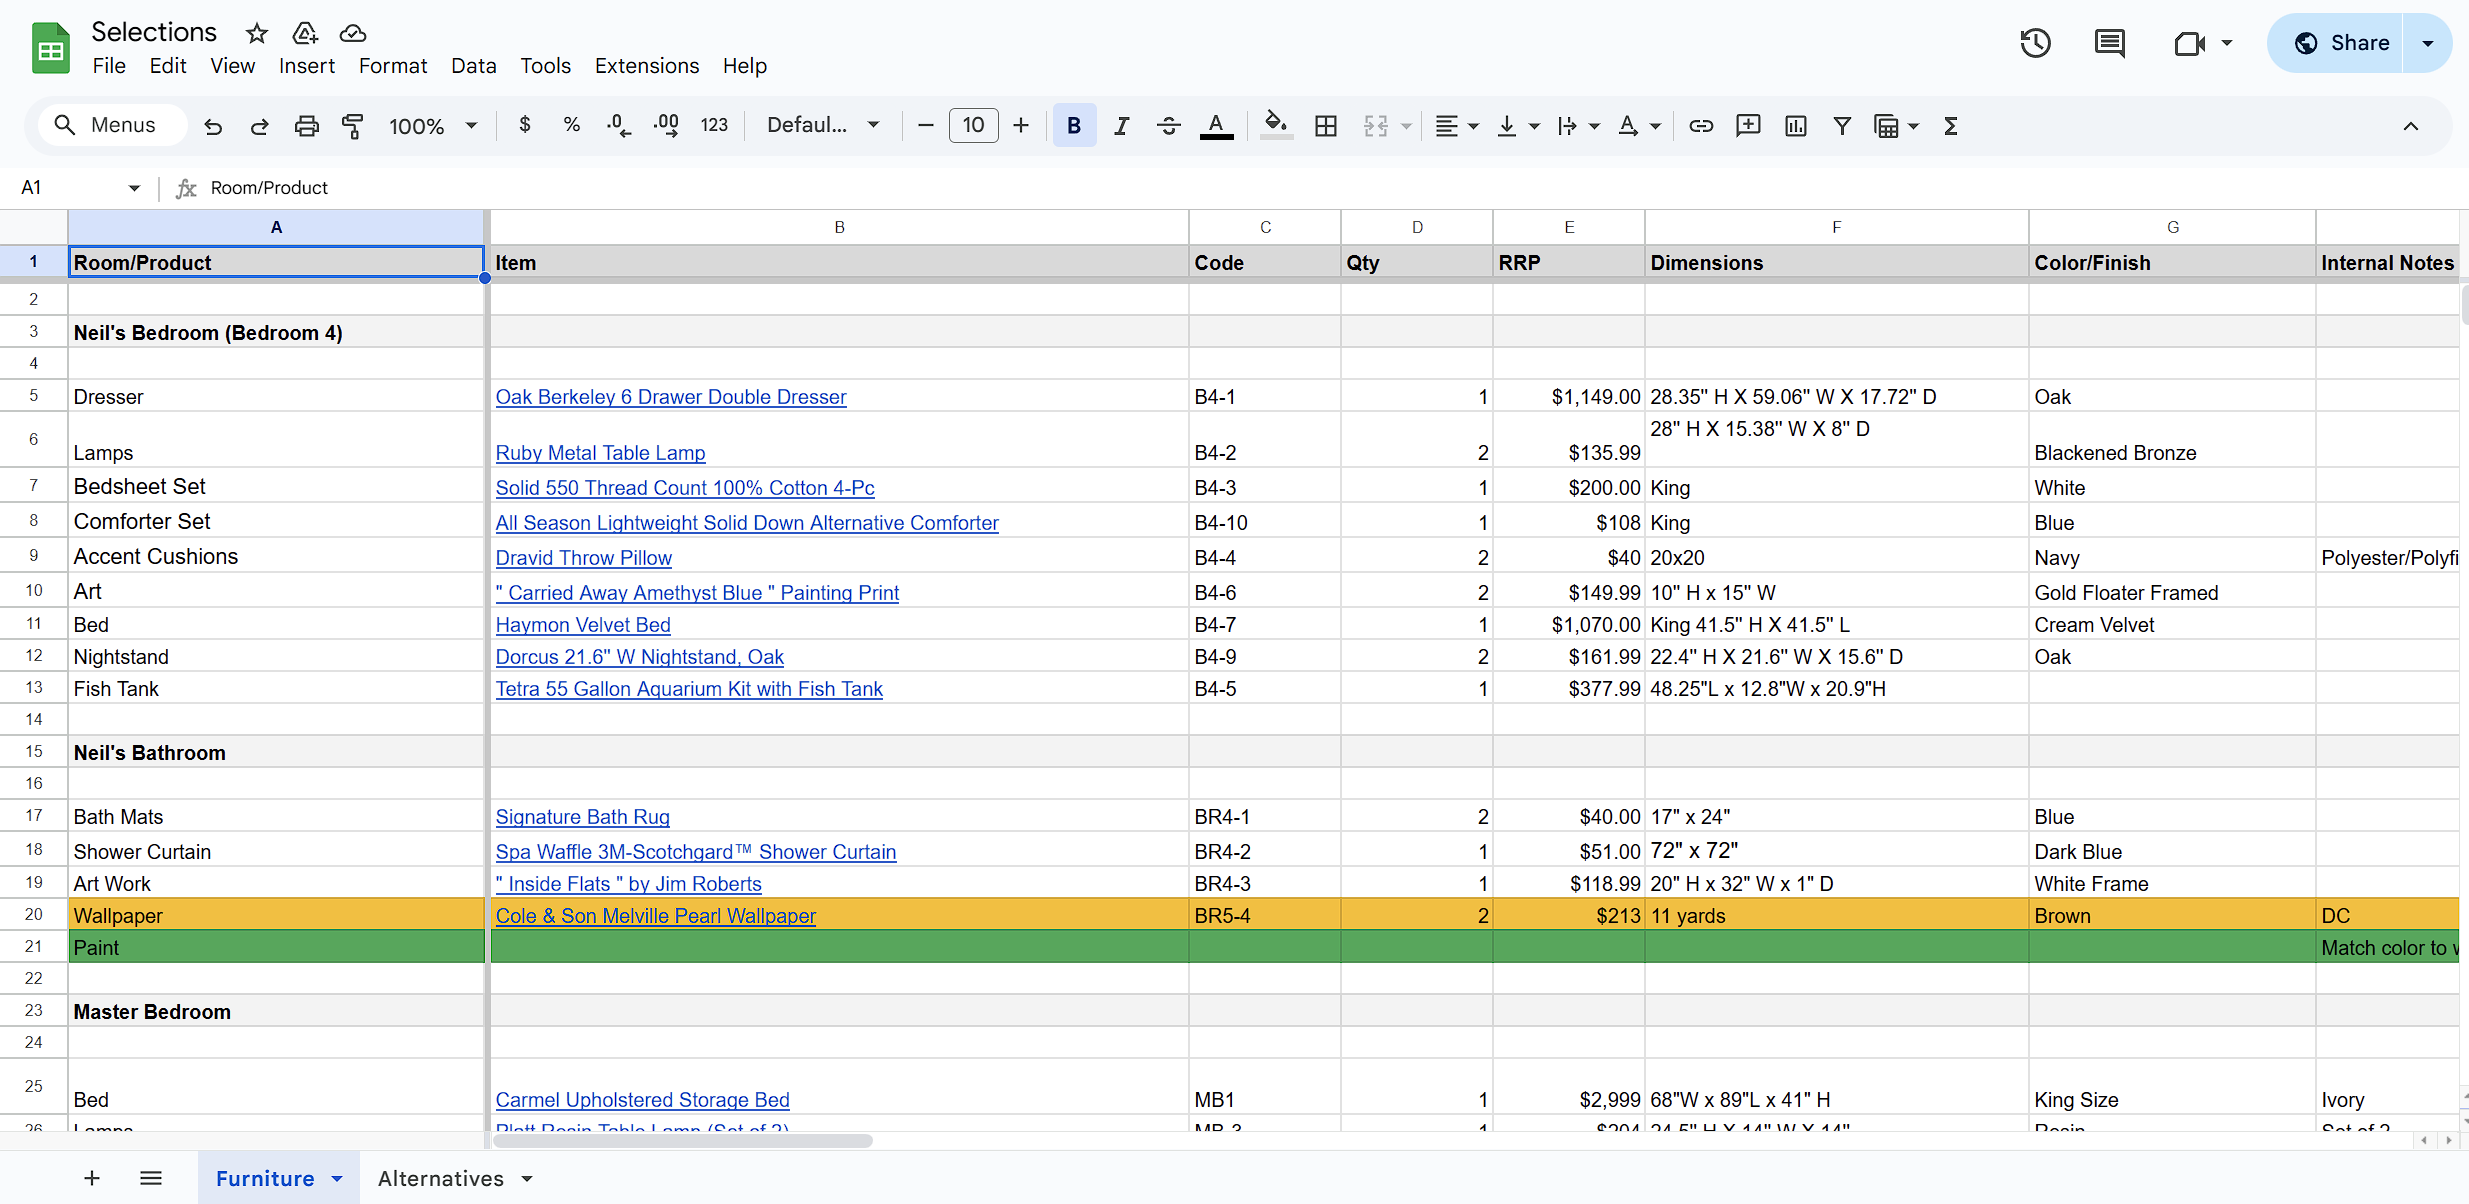
5. Provide Furniture Selections
Modeling furniture is one of the most time-intensive aspects of the rendering process. The more detailed and custom the furniture, the more hours it may require. We recommend having client approval for furniture selections before starting the rendering process to avoid delays or revisions.
If client approval isn’t possible upfront, you can opt for placeholders for some pieces. This will reduce project hours, but keep in mind that the rendering will lack the level of detail compared to custom furniture.
6. Turnaround Times for Renderings
- The typical turnaround for rendering one space is about 4 days. In terms of hours, it depends on the size of the space and the amount of furniture/lighting involved — complex furniture modeling can take a lot of time. Our usual range is around 2 to 8 hours per space.
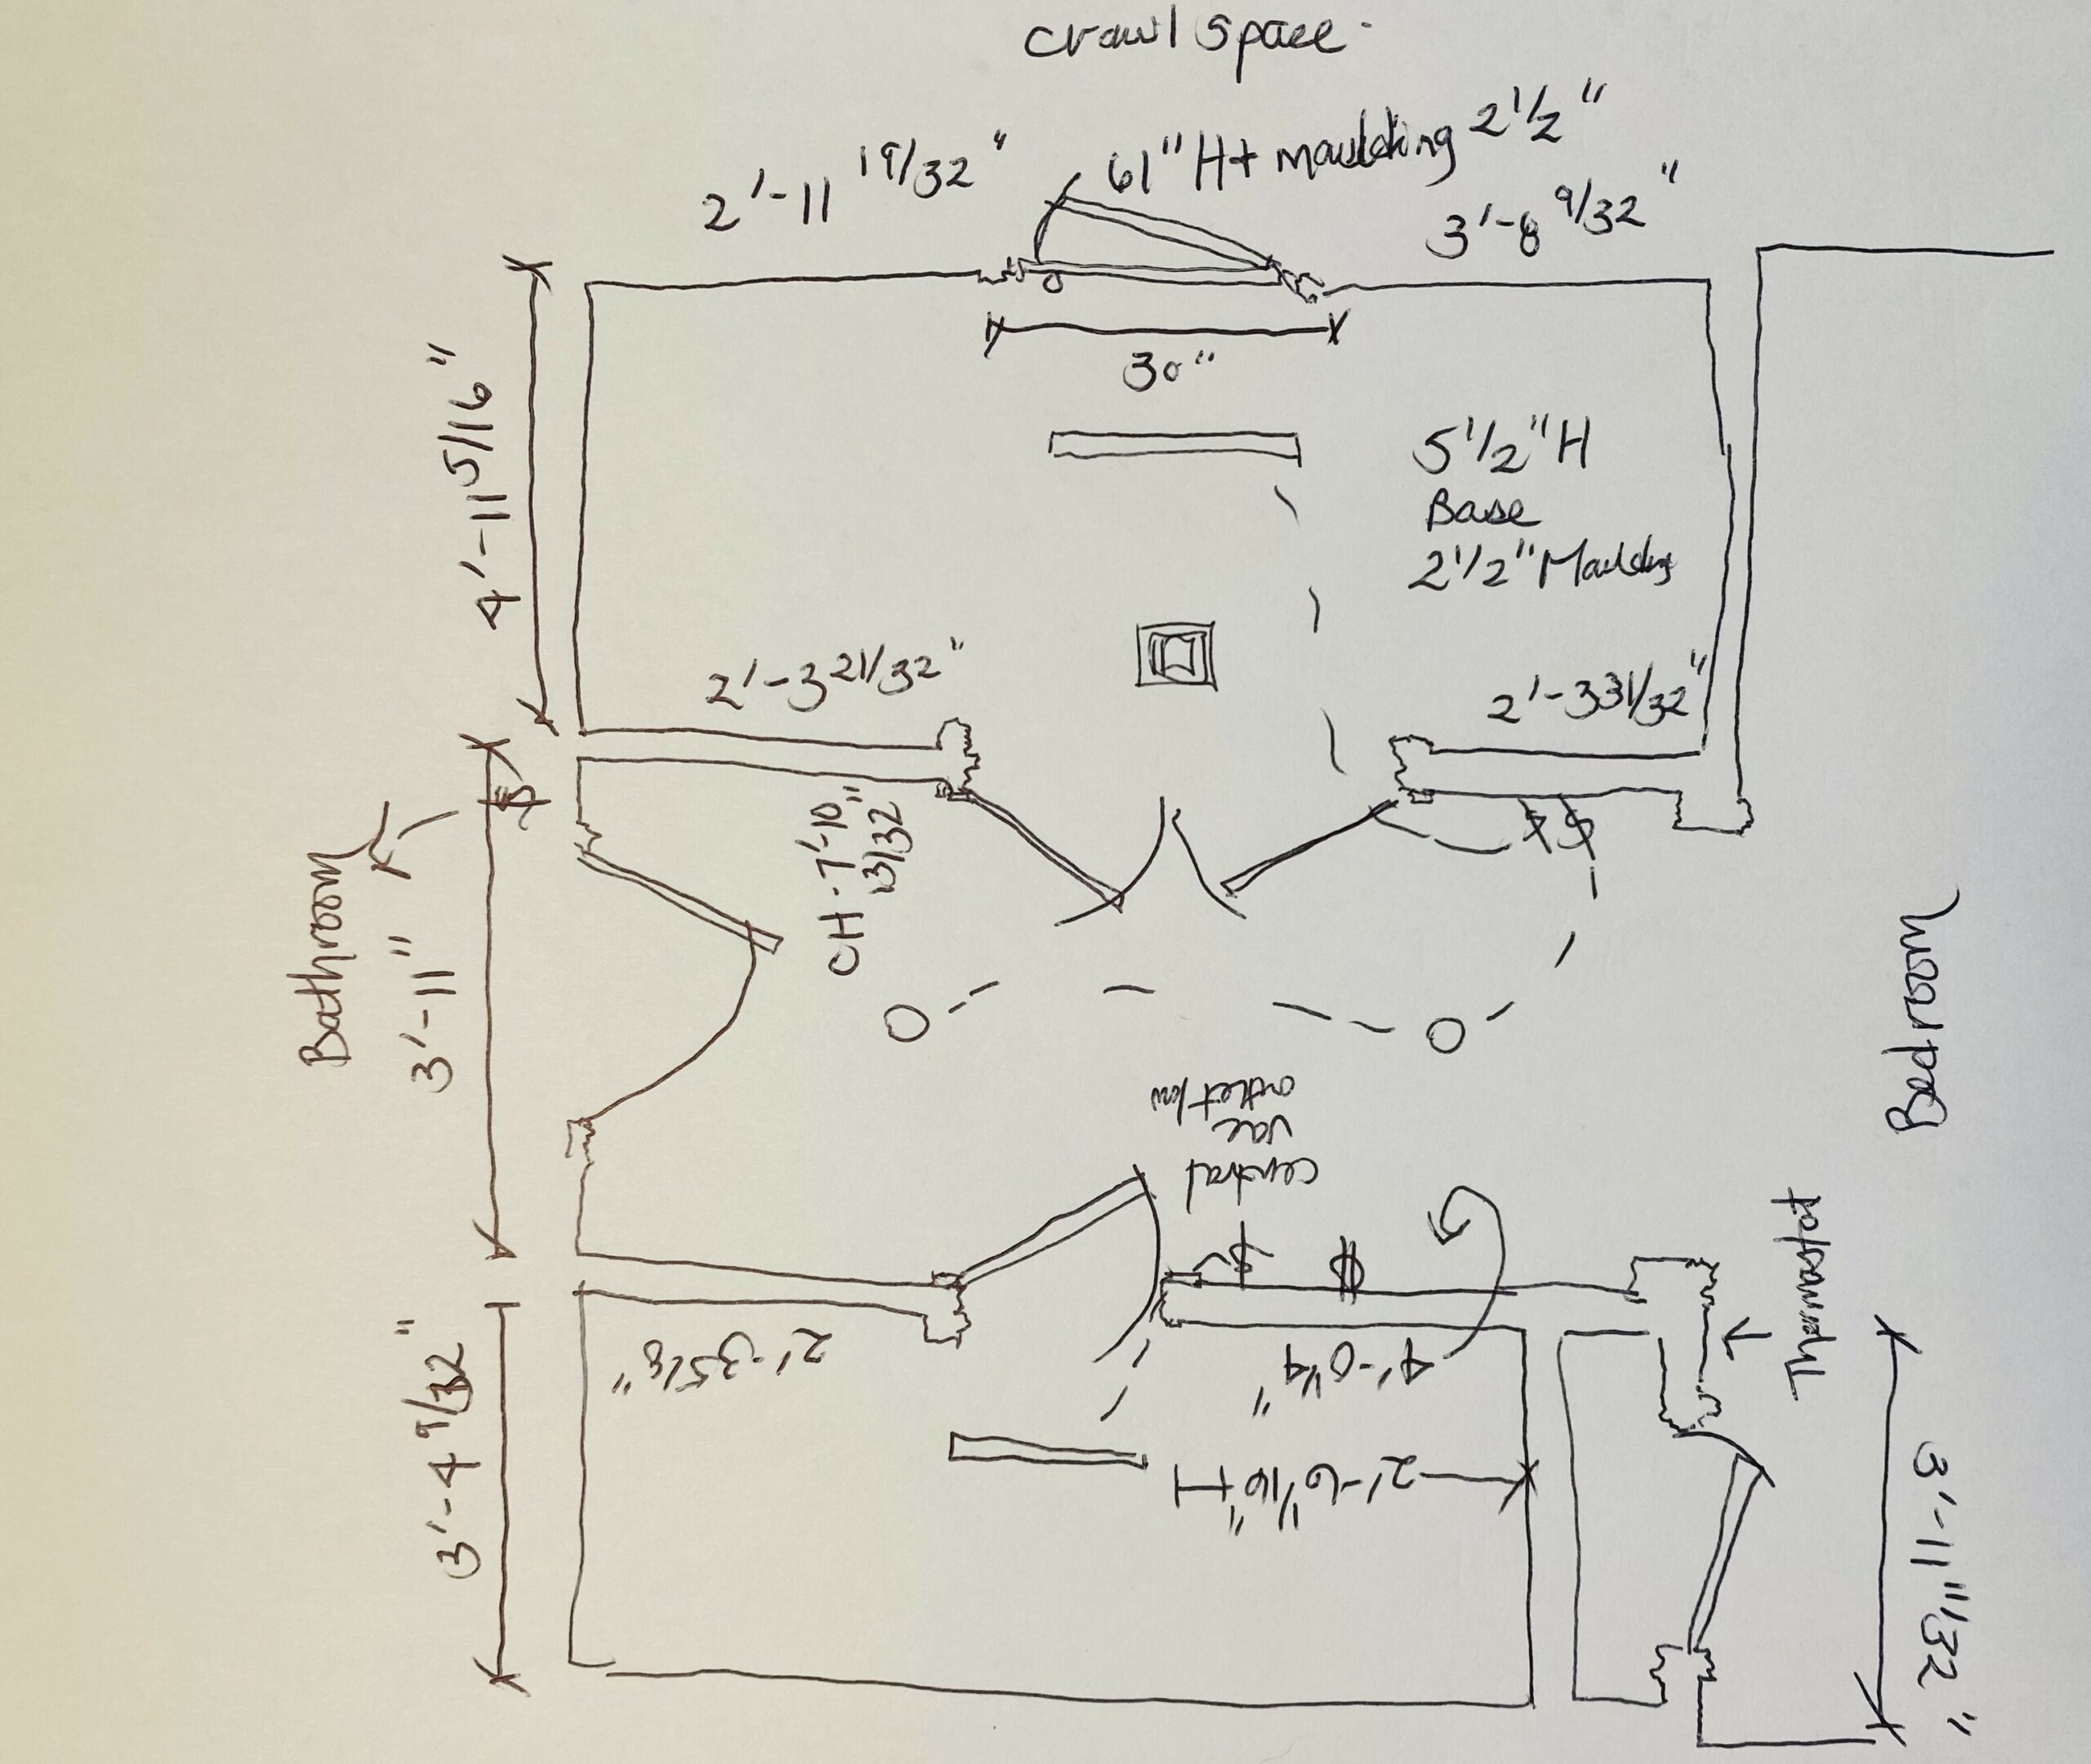
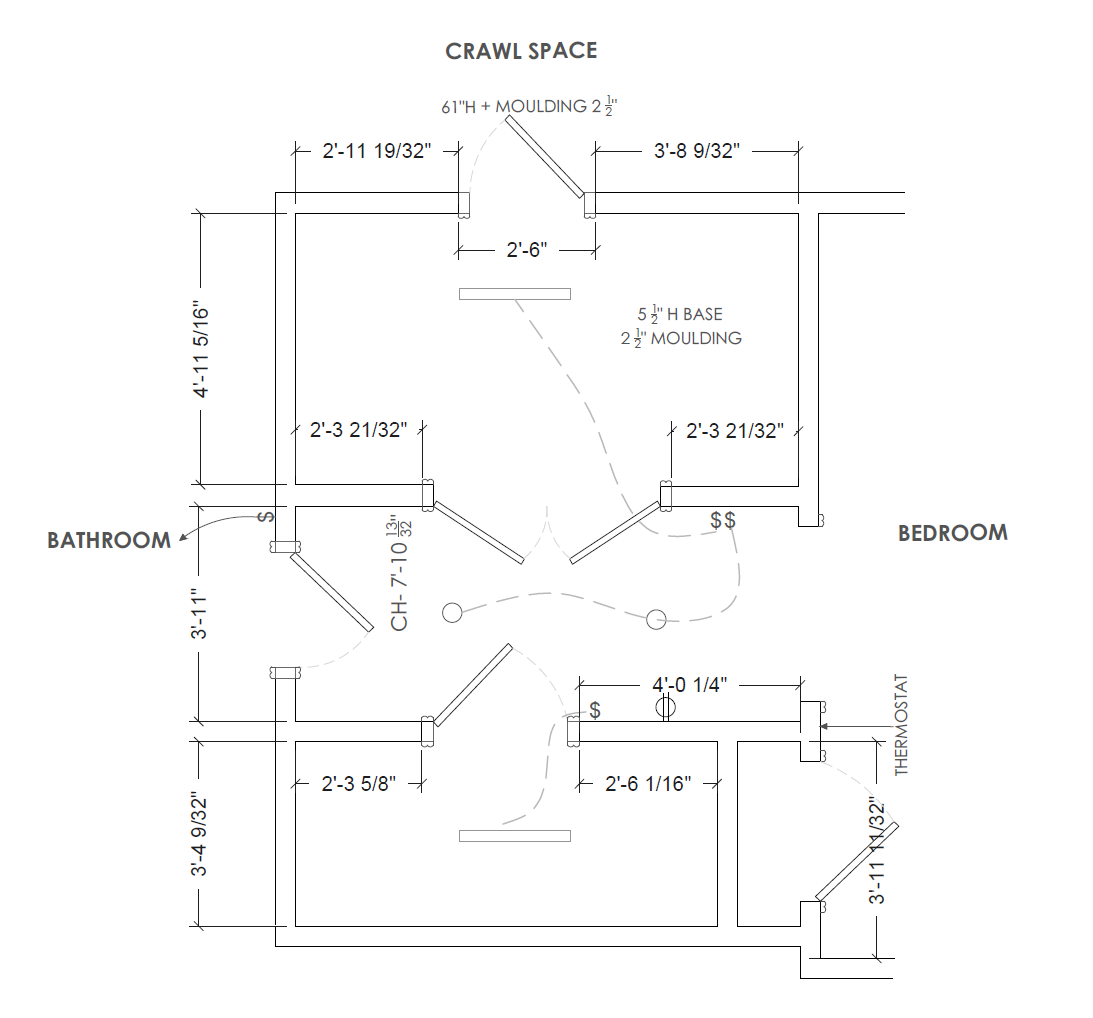
- We can provide clients with more accurate time estimates once they share details like floor plans or elevations. Another factor that affects time is the type of files the client provides. If it’s just a hand sketch, we’ll need to build everything from scratch, which takes longer. However, if the client already has a CAD or SketchUp file, that definitely helps cut down hours and makes the process more efficient.
After the rendering is completed, we will share it for your review. This allows you to provide feedback and request revisions before proceeding with the renderings.
7. Most Efficient Way to Provide Markups/Revisions
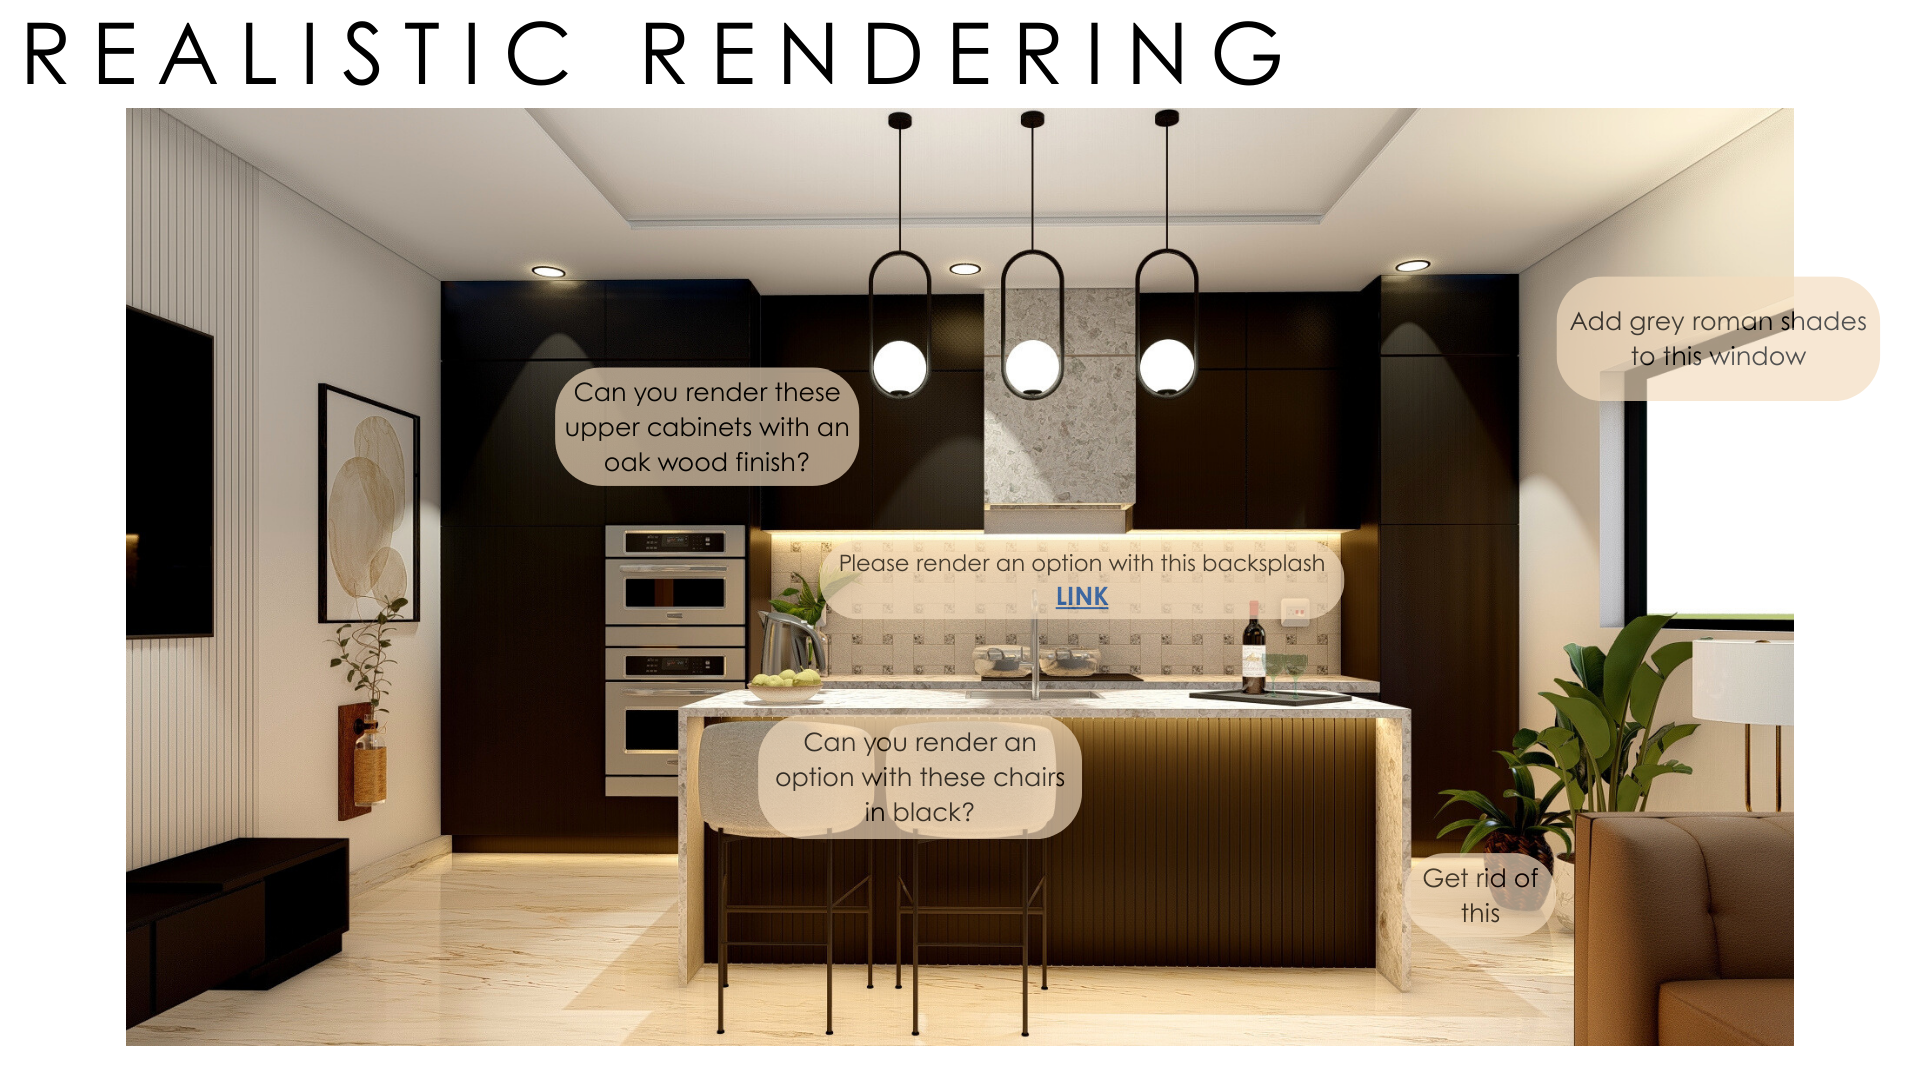
When reviewing the renderings and providing feedback, it’s crucial to be as specific as possible. The best way to mark up your revisions is by:
- The most effective method for providing markups is to annotate the first draft directly, clearly indicating the required changes. This approach eliminates ambiguity and enhances efficiency.
- For example, if a client requests an adjustment such as “increase the spacing between the wooden slats by 2 inches,” simply stating this in text may lead to confusion regarding which elements are being referenced—whether it’s the slats on the TV wall or those on the kitchen island. By marking the specific area directly on the image, the requested revision becomes much easier to understand and implement, streamlining the process.
The more specific the feedback, the quicker the revisions can be made, saving you time and ensuring that the final renderings meet your vision.

Following this checklist when delegating your rendering tasks to our virtual team at 4Dbiz, it ensures a seamless and efficient process that results in accurate, high-quality renderings that bring your design vision to life.
Ready to delegate and streamline your process?